Bruce Pegged Hardwood Flooring
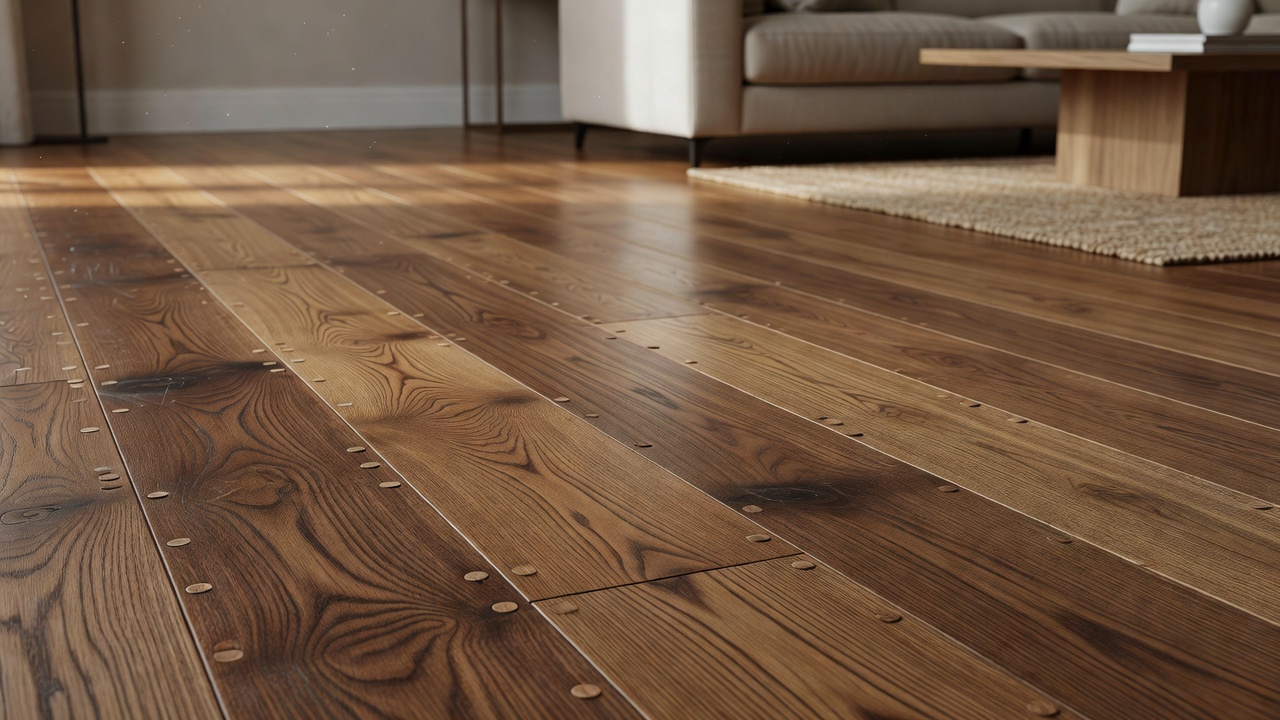
While Steve is on the road visiting the great folks we have around the country, I stepped in here to help out on a somewhat difficult situation:
Q: Steve-
I visited your store in North Atlanta where I received great service, but did not find what I need. Steve, I am in the process of removing a dining room wall and small closet. The floors in the dining room were installed approximately 20 years ago and the hallway which it connects to was installed when I built the house in 1975-6. I am looking for random width-pegged oak floors. The color is gunstock. I understand that Bruce discontinued this flooring in or around 1986, shortly after we put the flooring in our dining room. The planks are 2.25” and 3.25”in width. It would be possible to use unpegged flooring of the same color and style if that were available. We would simply drill holes and make our own pegs. Help!
Thanks for your assistance.
-Danny R.
A: The pegged appearance of flooring was rather popular for a time, but right around the mid to late 80s began to get phased out, much as you are experiencing. Recently I have only seen a few private label laminates which feature the pegged look as well as some bamboo, but not much in the hardwood category that was not custom made in home. Off hand, the only pegged flooring I know of from a major brand is the Patina Relics line made by Award. The only problem you run into here is that there are only 3 colors, so your selection is minimal. This being said, you might be best off purchasing an unfinished oak, staining it to match, then drilling and pegging the floor. After this is done, apply a site finish to ensure the entire floor has an even finish.
If you buy a pre-finished product from Bruce (or anyone for that matter) then drill and peg the floor, you will instantly void the floor’s warranty and you will still need to screen and site finish the floor in order to ensure you have a finish across the entire floor. This is easier to do with Oak than most other species, as Oak does not darken very much over time like other species of wood, meaning it will be easier to get the new flooring to match up to the old. All in all, I think your solution here would be to find an unfinished product and do this work on site to ensure the best results. Buy multiple widths of flooring in order to keep with the random width look (usually this is 3″, 5″ and 7″ widths mixed) then get to work with your install, drilling and pegging the floor and finally staining and finishing the floor (don’t forget a reward of a decent dinner for all that hard work).
Here is a bit of background about pegged flooring, which will also help out on the install process. Typically wood flooring any wider than 5″ is supposed to be face screwed to prevent the planks from curling. After nailing the tongue section during your installation you will then go back with a special drill bit an drill down about 1/4″ (or as deep as necessary to get to the top of the tongue in depth) then screw the floor down to the subfloor. After this is done, you will put some wood glue into the drill hole and plug the hole using a wooden dowel. Then cut the down using a back saw or similar hand saw and allow the adhesive around the peg to cure. There are some plugs made specifically for this process, but they are rather hard to find. After this is done, you will then sand down the peg/plug until it is flush with your floor. After this process is complete for the entire floor, you will then site finish the floor and call it a day.
As you can imagine based on just the description, true pegged flooring can be a time consuming process and expensive process, but in the end can look amazing. To sum up here, you are best off going with unfinished flooring (you might even be able to find pre-pegged unfinished flooring) then doing most of the work on site to ensure it ends up smooth and looking tip top.